Friday, November 25, 2011

The Race, Owl Napkin Rings, Cookies, and the Gratitude Card Consensus!

We had a wonderful Thanksgiving this year.
We started the festivities with a family run in the morning.  Sorry I forgot the camera for the big race.  My husband and my nephew had a one mile challenge race while the rest of us cheered them on and jogged the mile.  My husband was quite happy he can still out run a 13 year old. 
We will be doing this again next year, it was so fun!
We came home famished after our workout and started the feasting
Hey, we ran a whole mile, we deserved to indulge!

Here is the kid's table and a quick little dollar store napkin ring project.


I showed you the adult table in the last post.


I made these owl napkin rings for the kid's table.


I found the owl rings and the feather hair clips at the dollar store.


I divided these sparkly wired leaves that came clustered on a stem and hot glued the ends of each leaf together to form a circle.  This formed the base of my napkin ring.  You can see one of the base rings in this picture laying on the newspaper.


I removed the finger ring from the backs of the owls and feathers.  I added a little more hot glue and attached both to my leaf circle to complete the napkin ring.


I put the extras that weren't holding napkins around the candlesticks and votives.


I added a few spray painted white and gold pumpkins, some gold twig place mats, and red cranberry red chargers to complete the look.  The red bubble glasses belonged to my Grandmother.  We use them everyday.


As the turkey was cooking, the kids decorated cookies while the rest of the family drank champagne and watched football.

Casey
No time for smiling mom, I'm in the cookie zone.


These girls take their cookie decorating seriously.


My cousin Margaret (on the right hand side of this photo) made all the cookies and the Royal Icing for the decorating.  She uses a Martha Stewart recipe and these cookies are the best looking and tasting sugar cookies I have ever experienced.  She has brought them for the last two years of Thanksgiving and I hope she brings them again next year too!


These are her two girls
Darby and McKenna.
My youngest daughter Cami is on the right.


The dogs took care of any leftovers on the floor. 
My parent's dog Gigi came over to help Piper out with the clean up.

"Did you see that?  I called it first."

  
"Please give us turkey because we are cute."


The consensus on the Gratitude Cards is that Family is the Most Important thing that people are Thankful for.
Followed by their
friends, health, and their dogs.


Funny how no one talked about their car, computer, clothes, our any other material things?

It's the simple things that are the most important to all of us. 

I hope you and your family had an amazing Thanksgiving Day together!

Thanks for checking it out.

Visit thecsiproject.com

Wednesday, November 23, 2011

Thanksgiving Table

One table down, one kid's table to go.


I showed you in an earlier post how I made these velvet pumpkins for this year's table.
Blue is on my mind.


Here is last year's table,
purple, cranberry, and a mix of gold and silver.


For the center piece I added a golden magnolia acorn spray that I've had for years to the velvet pumpkins. I placed the center pumpkin on a small urn.


The smaller velvet pumpkins on each plate will hold the place cards (which I still need to make.)
I shouldn't have played volleyball at the beach yesterday.  I still have a lot to get done to get ready for our guests.  The decorating is the fun part.  I left all my house cleaning for last, I hate cleaning! 
I know I probably did the decorating/cleaning order backwards.


I used my wedding china, crystal, and gold chargers. 


The only thing purchase new for this year's table are these pale gray/blue tablecloths from Marshall's.  They are a great neutral color that I will be able to use over and over again for other events.  I paired them with my leopard print table runners.  The animal print helps warm up the coolness of the gray.  Without them everything was looking too pastel for Fall.

The brass candlesticks were borrowed from my mom. 
They belonged to my Great Grandmother.

For the center piece I elevated a round silver platter on meatloaf pans and skirted it with a feather boa so you can't see the pans.  On top of the platter I layered left over blue velvet fabric, velvet pumpkins, white ostrich feathers, gold and silver leaves and twigs, and faux white pumpkins to the ends of the center piece.  My original pedestal that I showed my velvet pumpkins on was too tall to be practical for this tablescape.  Many of the the center pieces I see in pictures, while beautiful, are either to tall or not tall enough for a dining table.  The meatloaf pans give just enough height without creating a "pumpkin wall."  I always do a center piece test run and sit down at the table to see if it's the right height for eating. 


I set the tables up inside our living room/office
Our formal dining room is outside.


It's supposed to rain here on Thursday.


If it rains my husband will be frying the turkey outside under the gazebo.  It's metal, so no fire hazard.  I'll just need to move the table and take down the chandelier so he doesn't bang his head on it.
This is our formal dining room/turkey frying when it rains room.

I'm excited to eat fried turkey and decorate Christmas cookies.
Decorating Christmas cookies on Thanksgiving with the kids is something I started with them when they were little.  The adults get into the decorating action too.

I still need to set the kids table.  I'll show you that one in a later post.
I hope you and your family have a wonderful day.
I'm so thankful for your visit.

Happy Thanksgiving!


I'm linking this to Censational Girls HomeGoods Tablescape Party.


The DIY Show Off

Monday, November 21, 2011

Vertical Gardening - The Experiment


Before I show you how I did this project please understand it's an experiment in progress.  Just so you know, my experiments don't always work out.  My kids still remind me about the yucky brownies I made with pureed spinach.


That being said, I'm really excited to see if this is going to work.  I've been intrigued and obsessed with vertical gardening for quite awhile now.  One of my earliest posts when I first started blogging was about vertical gardening.

My vertical garden started with blog land's favorite project starter at the moment, 
the all versatile wood pallet. 
I picked up this pallet from the back of my local grocery store for free. I didn't steal it, I asked the store manager if I could have it. She said I could have any of the ones that didn't have red or blue paint on them.
(The marked pallets are owned and reused by their vendors.)
 Mine was damaged.  I couldn't find one in pristine condition.  This pictures shows I have already removed the back cross slats.  Keep these as they will be added back on to the pallet later.


I found this vertical pallet planter at Life On The Balcony
Isn't it pretty? 
Notice it's resting on the ground outside.


Here is where the experiment comes into play. 
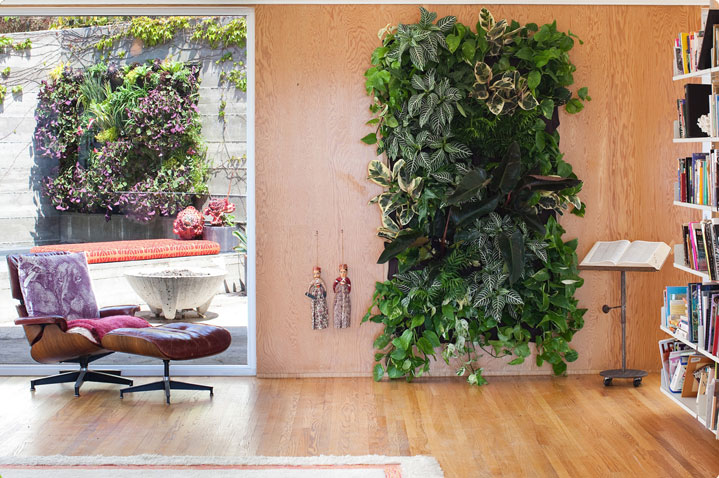
Do this project at your own risk, I'm still in the experimental phase and I'm not sure what the long term effect on my interior wall will be?
Yes, I typed interior wall.
This isn't a new concept. 
You can buy prefabricated interior vertical garden kits online but they are pricey.


Woolly Pockets

Two Big challenges I needed to address to make this project work:
 
1) The weight of the pallet needed to be secured on the wall, wet soil is very HEAVY.
             2)  It needed to be waterproof so the drywall wouldn't rot and grow mold. (water = damage)

This is not one of my best tutorials, I missed taking many steps of pictures due to muddy, stained, and bloody hands.  Also, I had to go back and repeat steps when the first attempt was abandoned.

I first determined where it was going to hang in the house.  I didn't take pictures of how I hung it on the wall, but this is what I did.  I sunk a 2 by1 horizontally the width of the pallet through the drywall and into the wall studs with long wood screws.  Then I hung 3 hooks with 100 pound each weight allowance on the 2 by1.  I'm hoping this will support up to a 300 pound object.  Cross your fingers. 
 I would NEVER put something like this above where people and pets could be crushed if it pulled off the wall.

DO THIS PROJECT AT YOUR OWN RISK!!!
Again this is an experiment in progress.
I figured how I was going to hang the pallet before I planted it.
Here is the trial run on the wall.  I stained the whole thing with a dark stain and repaired the damage.


 I brushed a gray wash over the brown stain because I thought it was a little too dark.  Next I wrestled a chicken wire frame to the inside of the pallet.  No pictures of this step because I was busy bleeding.  My arms looked like I tried to give a cat a bath after the chicken wire step.  
I will wear long sleeves and gloves if I ever use chicken wire again.   
This is a picture of the front.


I started by making a chicken wire shelf behind the top horizontal front slat but I baled on this idea for the next slat below after cutting myself up on the chicken wire.  This is picture of the back.  The chicken wire is stapled to the inside back and sides of the pallet.


 On attempt number one I used this potting soil, big mistake for an indoor planter, stinky!
I put the whole thing together plants and all before I realized, hey this thing stinks, I can't put it in my house.
I had to deconstruct the whole thing back to the chicken wire and wash it off to remove the "dairy smell."


 I added a layer of pond liner behind the chicken wire to the back and bottom of the pallet.  I used a staple gun to attach the liner and sealed it with marine grade silicone.  I wanted the back to be waterproof because it would be resting on the drywall.
Next I used wet moss and lined the sides and bottom of the inside of the chicken wire to contain the dirt.  I added a second layer of pond liner to the inside of the chicken wire.  The moss along the sides hides the pond liner from the side view.  At this point, add the back cross slats back onto the pallet on top of the pond liner to add support.   I added floral foam to the bottom and lower sides to absorb any water that seeped to the bottom of the pallet.  At least that's my idea of how it will work, again this is all a big experiment.  I have concrete floors in my family room.  I wouldn't attempt to hang this in a room with hardwood floors or carpet. 
  

I switched out the "dairy dirt" for cactus mix.  I couldn't find large bags of indoor potting mix at Home Depot this time of year.  Christmas has taken over the indoor plant section and I was to lazy to make a trip to the plant nursery.  I used almost 2 cubic feet for the pallet. 
Pack it down firmly to prevent the dirt from shifting.


I used succulent cuttings to plant my pallet.  Not sure if they will thrive on an interior east facing wall?  To see how I propagate my own succulents go here
I added an orchid that was finished blooming to the top of the pallet.


It took me, my husband, and our 14 year old daughter to hang this.  It's really heavy! 
So far the hooks are holding. 
We hung it under my metal hanging planter light.


The succulent cuttings need time to fill in, if they live at all in this spot in the house.  I chose succulents as apposed to more traditional house plants because of their low water requirements.  The more I need to water, the more likely I'll have water damage. 


I can be patient and let everything grow.


I'll let you know how the experiment works. 
I'm keeping my fingers crossed that the succulents thrive and I won't be doing any drywall repair anytime soon.

Have you added any vertical gardens to your home or garden?
I would love to see them.

Thanks for checking it out.


Related Posts Plugin for WordPress, Blogger...